Difference between revisions of "Tomb of Tal Rasha"
m |
|||
| (6 intermediate revisions by 2 users not shown) | |||
| Line 28: | Line 28: | ||
The other six tombs became resting places for other powerful Horadrim mages, and acts to some degrees as decoys in the [[Canyon of the Magi]]. | The other six tombs became resting places for other powerful Horadrim mages, and acts to some degrees as decoys in the [[Canyon of the Magi]]. | ||
| − | |||
| − | |||
| − | |||
| Line 40: | Line 37: | ||
| − | Tyrael left the Wanderer to tell Marius he just ensured the doom of [[Sanctuary]] and told him to go to the [[Temple of Light]], in the eastern city of [[Kurast]]. He should enter the gate to Hell and take the stone to the [[Hellforge]] to destroy it. He unfortunately did not do so, and later ended up in an insane asylum. | + | [[File:Chamber_of_Tal_Rasha_opening.jpg|220px|right|thumb|A [[Horadric Staff]] used to open the [[Chamber of Tal Rasha]].]] |
| + | Tyrael left the Wanderer to tell Marius he just ensured the doom of [[Sanctuary]] and told him to go to the [[Temple of Light]], in the eastern city of [[Kurast]]. He should enter the gate to Hell and take the stone to the [[Hellforge]] to destroy it. He unfortunately did not do so, and later ended up in an insane asylum. Baal and Mephisto jumped Tyrael and tied him to the stone instead. | ||
| − | + | When a band of heroes came looking for the Wanderer, out of the seven tombs, the true Tomb of Tal Rasha was marked near its entrance with a symbol noted from the [[Arcane Sanctuary]], where the heroes had come from before. At the bottom of the Tomb, an Orifice to place an [[Horadric Staff]] a path to [[Tal Rasha's Chamber]]. How the Wanderer and Tyrael got in without boring a hole in the wall to get in is not known. | |
What happened to the Tomb of Tal Rasha after Tyrael was freed is unknown. | What happened to the Tomb of Tal Rasha after Tyrael was freed is unknown. | ||
| + | |||
| + | |||
==Diablo II== | ==Diablo II== | ||
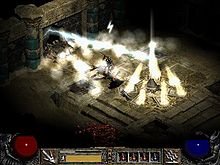
| − | :''{{iw|Tal_Rasha's_Tomb Tal Rasha's Tomb}} | + | [[File:Tal_Rasha's_Tomb.jpg|right|450px|thumb|Lowest part of the Tomb, [[Chamber of Tal Rasha]].]] |
| + | :''Main article: {{iw|Tal_Rasha's_Tomb Tal Rasha's Tomb}}'' | ||
In [[Diablo II]], the only way to reach the [[Canyon of the Magi]] is from the [[Arcane Sanctuary]], and the right tomb is marked with the one symbol missing from the sanctuary. | In [[Diablo II]], the only way to reach the [[Canyon of the Magi]] is from the [[Arcane Sanctuary]], and the right tomb is marked with the one symbol missing from the sanctuary. | ||
| Line 55: | Line 56: | ||
The other tombs are good for loot. | The other tombs are good for loot. | ||
| + | |||
| + | |||
| + | |||
| + | ==Media== | ||
| + | <gallery> | ||
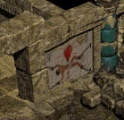
| + | File:Tal_Rasha_mural.png|Mural with Tal Rasha | ||
| + | File:Binding_Stone.png|[[Binding Stone]] | ||
| + | File:Tal_Rasha_imprisoned.jpg|Painfully imprisoned | ||
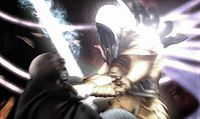
| + | File:Wanderer.jpg|[[Wanderer]] fights [[Tyrael]] in the chamber | ||
| + | File:Chamber_of_Tal_Rasha_opening.jpg|How to open Tal's chamber | ||
| + | File:Tal_Rasha's_Tomb.jpg|Overlay of the Chamber | ||
| + | </gallery> | ||
==Related Links== | ==Related Links== | ||
| − | + | * {{iw|Tal_Rasha's_Tomb Tal Rasha's Tomb in Diablo II}} | |
| + | ** {{iw|Chamber_of_Tal_Rasha's Chamber of Tal Rasha in Diablo II}} | ||
* [[Tal Rasha]] | * [[Tal Rasha]] | ||
* [[Baal]] | * [[Baal]] | ||
| Line 76: | Line 90: | ||
| − | {{ | + | {{Location navbox|west}} |
| − | |||
| − | [[Category: | + | [[Category:Sanctuary]] |
[[Category:Aranoch]] | [[Category:Aranoch]] | ||
| + | [[Category:Dungeons]] | ||
| + | [[Category:Act II]] | ||
Latest revision as of 19:09, 7 November 2011
The Tomb of Tal Rasha is the last "resting" place of Tal Rasha used to hold not only its namesake, but also the essence of Baal inside the broken Soulstone lodged inside Tal Rasha. The tomb was made as one of seven identical tombs in the Canyon of the Magi.
Background[edit | edit source]
The canyon was likely called something else before Tal Rasha and fellow Horadrim mages were buried there, since the tombs were ancient even before they reached the location. The tombs themselves were likely called something else as well.

Tal Rasha led the campaign for hunting down and capturing the Prime Evils, including Baal during the Sin War together with Jered Cain. When the Prime Evils were exiled from Hell into the Mortal Realm by the Lesser Evils a group of mages brought together by the Archangel Tyrael organised themselves in order to defeat them and bind them to Soulstones which were provided by Tyrael. They called themselves the Horadrim.
After finding and capturing Mephisto in Kehjistan's jungles, burying him under what later became Kurast, the Horadrim chased Baal across the ocean to the Western continent, in to the Aranoch desert. Tal Rasha presumed Baal was heading north toward Scosglen, but mysteriously the demon changed its path and took refuge within the desert city of Lut Gholein.
Tal Rasha ordered his team to hold the attack and to patiently await for Baal to continue his escape. Three days later, Baal fled Lut Gholein heading to the north, as Tal Rasha had predicted.

A few miles into the desert, the adventurers caught up with Baal and attacked him. The demon unleashed the fury of his powers upon the men. The earth exploded under them and swallowed many men. Fire erupted from the broken earth burning everything and everyone on its path.
In a desperate attempt, Baal hurled a spell at Tal Rasha unsuccessfully. Unharmed, but at a price, Tal Rasha rose from the earth to find the Soulstone given to him by Tyrael had shattered into small shards. The men pressed their attack and defeated Baal. Tal Rasha walked toward Baal's battered body and slashed his throat jamming the largest Soulstone shard into his open wound. Baal's spirit was sucked into the shard, trapping the demon.
Archangel Tyrael appeared before the men and led them toward seven ancient tombs deep in the desert. There the men were instructed to build a binding stone etched with runes of containment. They magically crafted unbreakable chains to secure the binding stone to the chamber's walls. Tal Rasha ordered to be chained and bound to the stone. To everyone's astonishment, Tyrael jammed the shattered Soulstone into Tal Rasha's chest, allowing Baal's spirit to flood into his body as host, thus completing the prison, dooming Tal Rasha to struggle for eternity against Baal.
The other six tombs became resting places for other powerful Horadrim mages, and acts to some degrees as decoys in the Canyon of the Magi.
Centuries later, Diablo freed himself and travelled in the guise of the Wanderer to the Aranoch desert with Marius to free his older brother. As the two reached the Tomb of Tal Rasha, Tyrael caught up with the pair and attacked the Wanderer to prevent him from freeing his brother.
Baal lured Marius with a facade image, asking for help. Marius could only see a poor man bounded by chains, impaled by an object on the chest. Tyrael's gaze turned around toward Marius, and he called out to him not to pull the shard out. Marius grabbed the shattered Soulstone shard and pulled it free from Tal Rasha's body.
Tyrael left the Wanderer to tell Marius he just ensured the doom of Sanctuary and told him to go to the Temple of Light, in the eastern city of Kurast. He should enter the gate to Hell and take the stone to the Hellforge to destroy it. He unfortunately did not do so, and later ended up in an insane asylum. Baal and Mephisto jumped Tyrael and tied him to the stone instead.
When a band of heroes came looking for the Wanderer, out of the seven tombs, the true Tomb of Tal Rasha was marked near its entrance with a symbol noted from the Arcane Sanctuary, where the heroes had come from before. At the bottom of the Tomb, an Orifice to place an Horadric Staff a path to Tal Rasha's Chamber. How the Wanderer and Tyrael got in without boring a hole in the wall to get in is not known.
What happened to the Tomb of Tal Rasha after Tyrael was freed is unknown.
Diablo II[edit | edit source]

- Main article: Tal Rasha's Tomb
In Diablo II, the only way to reach the Canyon of the Magi is from the Arcane Sanctuary, and the right tomb is marked with the one symbol missing from the sanctuary.
In the bottom of the true tomb, there's an orifice to enter the Horadric Staff, which leads to Tal Rasha's Chamber.
The other tombs are good for loot.
Media[edit | edit source]
Related Links[edit | edit source]
References[edit | edit source]
| Sanctuary[e] Act 1 Act 2 Act 3 Act 4 Act 5 |
|---|
| Act 1 | [e] | ||||
|---|---|---|---|---|---|
|
Char. Level: 1 - 20
|
Khanduras |
• The Old Ruins (m) | |||
| (X) = Typical character level for that area - (m) = Map of area | |||||
| Act 1 categories: Dungeons Settlements Structures Maps |
|---|
|
Bonus Areas Cemetery of the Forsaken Fields of Misery |
Festering Woods Leoric's Hunting Grounds |
The Old Ruins Old Tristram Road |
[e]
• The Royal Crypts (m) Wortham Southern Highlands |
|
Blank for now. Maps are the small (m)s |
[e] |
| Act 2 | [e] | ||||
|---|---|---|---|---|---|
|
Char. Level: 12 - ? |
Kehjistan |
||||
| (X) = Typical character level for that area | |||||
| Act 2 categories: Dungeons Settlements Structures Maps |
|---|
|
Kehjistan |
[e] |
|
Caldeum |
[e] |
|
Blank for now. Maps are the small (m)s |
[e] |
| Act 3 | [e] | ||||
|---|---|---|---|---|---|
|
Char. Level: ? - ?
|
Dreadlands
|
|
|
||
| (X) = Typical character level for that area | |||||
| Act 3 categories: Dungeons Settlements Structures Maps |
|---|
| [e] |
|
Bash |
Cleave |
Frenzy |
[e] |
|
Bash |
Cleave |
Frenzy |
[e] |
|
Bash |
Cleave |
Frenzy |
[e] |
| Act 4 | [e] | ||||
|---|---|---|---|---|---|
|
Char. Level: ? - ? |
' |
| |||
| (X) = Typical character level for that area | |||||
| Act 4 categories: Dungeons Settlements Structures Maps |
|---|
|
Bash |
Cleave |
Frenzy |
[e] |
|
Bash |
Cleave |
Frenzy |
[e] |
|
Bash |
Cleave |
Frenzy |
[e] |
|
Bash |
Cleave |
Frenzy |
[e] |
| Act 5 | [e] | ||||
|---|---|---|---|---|---|
|
Char. Level: 60 - ? |
Khanduras |
||||
| (X) = Typical character level for that area | |||||


